
My apologies for not posting recently and having little (actually scratch that), NO posting history lately.
You see, instead of the typical internet marketing blog that makes all of their money by teaching you how to make money, I am actually out there practicing what I preach. I started this blog to help people and cut through all the BS in the industry. If I do not have something helpful to post, I would just rather not post.
Recently, I noticed that a lot of people on Reddit’s Entrepreneur Subreddit seemed to always have an interest in online marketing. I decided I would share my porn method to see if I could help out a few people taste their first few dollars online. This post received very mixed feelings and hundreds of comments. Half of them were attacking me for using affiliate links (after 3+ years in the industry, habit!), and the others were positive, asking questions, and discussing the method. For anyone who is doubting the method works, here is a screenshot showing a sub affiliate making $637.81 in 3 days! Not bad for someone who took the method, twisted it, and ran with it.

Now after I posted that guide, people from all over the world started messaging me asking questions. This was great, and I always try and respond to help people out.
The funny thing is the vast majority of the messages I received were not asking about the method, but rather how to start a blog, how to create a site, what first steps to take, how to do keyword research, and among other things, how can I get started with making money online without promoting smut.
Responding to all those people began to get a bit hard, so here it is. Here is a long detailed guide on how to start a niche or authority site from scratch that is going to earn you money. Be warned, this is going to be a long guide. Grab some coffee, put your glasses on, and lets do this!
What Will You Learn
- Who Am I?
- Step 1: Picking A Niche
- Step 2: Keyword Research
- Step 3: Setting Up Your First Website
- Step 4: Writing Content For Your Website
- Step 5: Collecting Emails
- Step 6: Content Promotion
- Wrapping It Up
Who Am I?
Before we get into the actual guide, I should probably preface that by letting you know who I am and why you should take the time out of your day to listen to what I have to say.
When I was first starting out, like almost everyone, I looked up to the online “gurus”. You know those guys who make all their money online by telling you how to make money online? They would post their screenshots that would inspire me. The more I learned about internet marketing, the more frustrated I got with these people. Rehashed info all for the sake of pushing begnners to buy the latest and greatest bullshit product that is neither needed nor helpful.
You can read a quick, down and dirty background on my about me page. My first niche site was my first success. I started building small niche sites promoting big ticket commissions and soon enough I was full time. This was great but not a sustainable way to do business as I relied heavily on backlinks. In this guide, I want to teach you how you can create a long term sustainable business without losing your only income stream overnight which has happened 4 times to me. That is not to say heavy links do not work! In fact, they work great!

I post this screenshot not to brag, but to inspire you! You can make real money on the internet and a lot of it. The income stream shown above did not last long but it was a nice source of income. The value you need to remember before you start this guide is to think long term. Do you want to work your ass off for some quick money, possibly fail, and be left with nothing…. or do you want to work hard, work smart, and have an income stream for years to come? Hopefully you pick the later.
Hopefully your gears are turning now, lets get started.


Step 1: Picking A Niche
Picking a niche is going to set the stage for your upcoming website. There is a lot of debate out there if you should chose a niche that you are interested in, know a lot about, and have the ability to write articles on that topic or if you should follow the money.
Since this guide is aimed at beginners, I am going to say that you should pick a niche that you know something about. You probably do not have the money to outsource articles right away. This means you have a lot of work ahead of you and will need to do it yourself (this is always a good starting point to learn what you are doing correctly before moving to outsourcing).
The goal is to pick a niche where you will have an endless amount of content to write if you are creating an authority site, or pick something where you can be the most in depth and helpful information on a specific product or topic if you are creating a niche site. Many niche sites evolve into authority sites over time so you can always start small and expand.
Think of your niche as an umbrella. Here are some possible broad niches to explore:
- Health
- Fitness
- Finance
- Security
- Pets
- College
- Technology
Jot down 10-20 ideas on a piece of paper or your computer. You want to brainstorm everything that interests you and that people are passionate about.
Passion is very important when creating a website for both the people visiting your site (making you money!), and the creation of the site. If you have no passion, your site will soon die out and you wasted your time.
Tip #1: Online Marketplaces
The reason I started online was that I saw a site selling for $40,000 on Flippa.com. I knew I could make a better site and it turns out I was right.
After you have brainstormed some ideas for yourself, head over and check out the online marketplaces and see what is being sold. I like to sort my searches on Flippa by recently sold and scrolling through to see if anything interests me.
If I see that a website has sold in a niche I am interested in, I check it out. Ask yourself if you could create a site that would offer more value to your visitors. Could you take a new angle on this information? Could you write more content on the topics they have chosen? If the answer is yes to any of those questions, write that niche down.
Tip #2: Random Word Generators
If you are still struggling to come up with a niche, try out some random word generators. I landed on Athletics. You then want to find out where this would fit in an overall site structure. For example: Fitness -> College -> Sports Athletics -> Rowing -> Avoiding Blisters While Rowing
Step 2: Keyword Research
This is, in my opinion, the most important part of the entire process. You should do this before you ever buy a domain or hosting. You need to spend a good amount of time doing this. That is going to be the difference between wasted effort, and effort that makes you money.
By this point, you should have a general niche chosen for your site. The mistake I have seen people make over and over again is deciding to purchase a push button keyword research tool. They rely on this tool to tell them how hard the competition is, and what keywords they should be going for. This is hands down the WRONG approach and I will recommend you never make this stupid mistake.
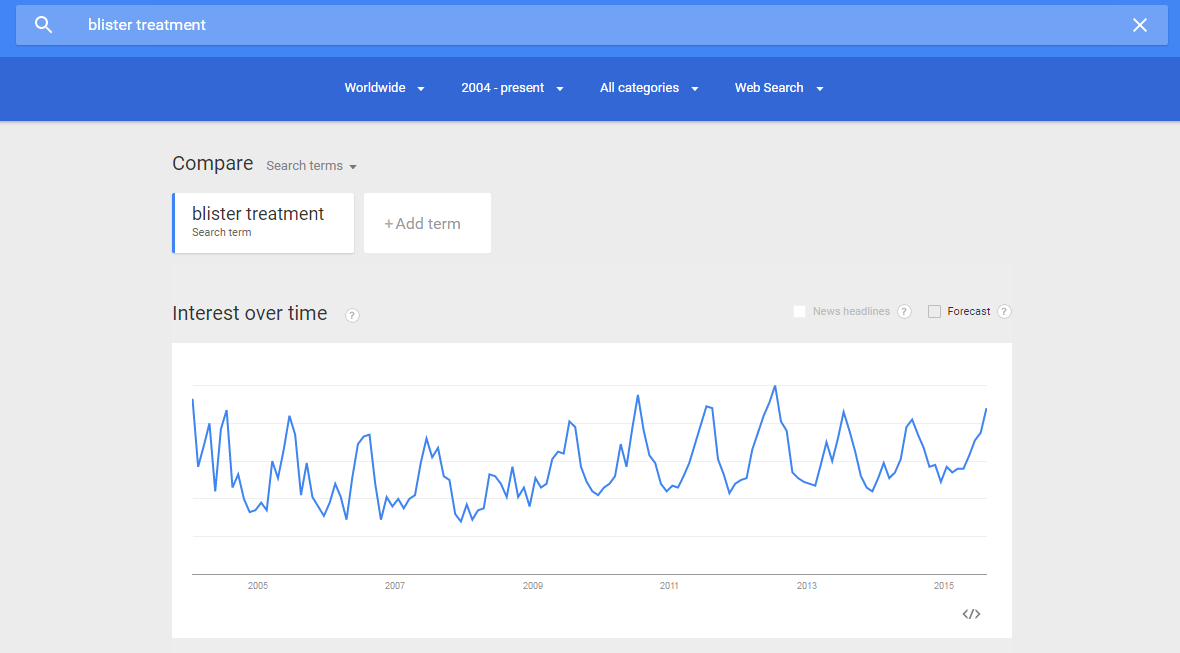
Second, you should check Google Trends to see if your niche is stable and not declining. You can find Google Trends Here. As you can see from my example niche, it is not declining or seeing a massive spike in popularity and then disappearing. You can also find out if the keyword is seasonal or not using this tool. Make sure you make note of the reasonal interest. If your niche is popular in India but you want to promote products that only sell in the USA, this will not work.
Below is how I do my keyword research.
Steps I Take To Find Keywords
- The first thing I usually do is head over to a site like http://ubersuggest.org/ and enter in your broad niche. Using the above example of blisters, I decided to put in “blister treatment”. Write down all the keywords that are related to your main niche.
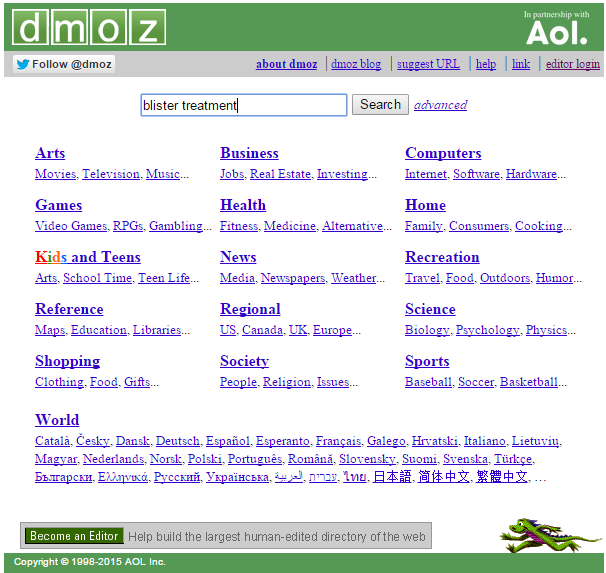
- Next, I will head to http://www.dmoz.org/ and enter in “blister treatment” This will bring up a list of categories for you that contain sites centered around this topic. You will see a list of categories up top and below you will see some of the sites listed. The categories are laid out in a similar format that we have listed above. This is a great way to find niches within niches. Write these down.
- Repeat this process by heading over to the Yahoo Business Listing Directory. Write down any potential keywords you see.
- Next, I want to see what real people are actually searching for. Remember, since the goal is to create a site and run it like a business, we want to provide value for anyone who lands on our site. What better way to provide value than answering the question they were searching for in the first place.
To do this, head over to Google and search for “Keyword Forum”. In the case of blister treatment, I would search for “blister treatment forum”. You should see forums for your given niche where users are interacting with each other, asking, and answering questions. Write down any questions you see people asking and what they are talking about. Forums are extremely easy to beat when it comes to ranking your site, but more on that later.

By this point, you should have some keywords written down for your niche. These are going to be your “seed” keywords which we will use to find other keywords in which to target.
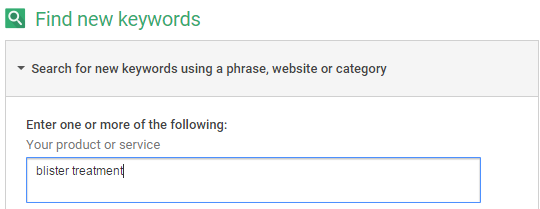
- Now it is time to go to the Google Keyword Planner and find out how many people are searching for your keywords, plus find a lot more! You will need an adwords account to access this tool so sign up for an account.
Once signed up, click on Tools –> Keyword Planner –> Search for new keywords using a phrase, website or category and enter in a keywords, 1 per line.
- Once you have entered in your keywords, click on “Get Ideas”. The screen that pops up should have 2 tabs. The first tab is for Ad group ideas. This is a place, even if you are not going to run ads, to get more keywords! Write down any keywords you see that relate to your niche.
- After you have those keywords written down, click on the “Keyword Ideas” tab. This is where any keywords that are related to your niche are going to show up. Write down the ones you think would make a good addition to your niche or authority site you are going to be creating.
Remember, you can sort these average monthly searches and look at them that way.
Tip #3: Higher monthly searches are not always the best keywords
You want to pick keywords that you can write about and have buyer intent. It might be worth your time going after one hundred smaller terms (few hundred searches a month), than it would be going for a few terms that have 10k searches a month.
Tip #4: The competition column has absolutely nothing to do with ranking websites
This column is to see how many advertisers there are running Adwords with that keyword. I would disregard this section completely.
Tip #5: Spy On Other Websites
If you have made it this far, you probably have a good amount of keywords in your list right now. The next step I take is finding out what sites are out there and taking a look at what kind of keywords they have targeted.
To do this, take a keyword from your list, and Google it (in an incognito window). For this example, I picked “how to treat blisters” which I found in the Keyword Planner that has over 6,000 searches a month.
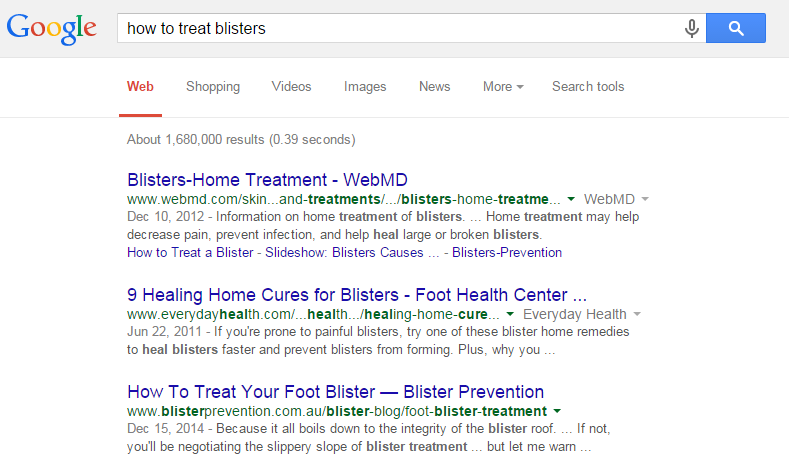
From this, the third result peaks my interest. It looks like a niche site. This is what we are looking for. Once we some niche sites that are ranking for keywords we are interested in, it is time to get a general idea what their web traffic looks like and what other keywords they are ranking for.
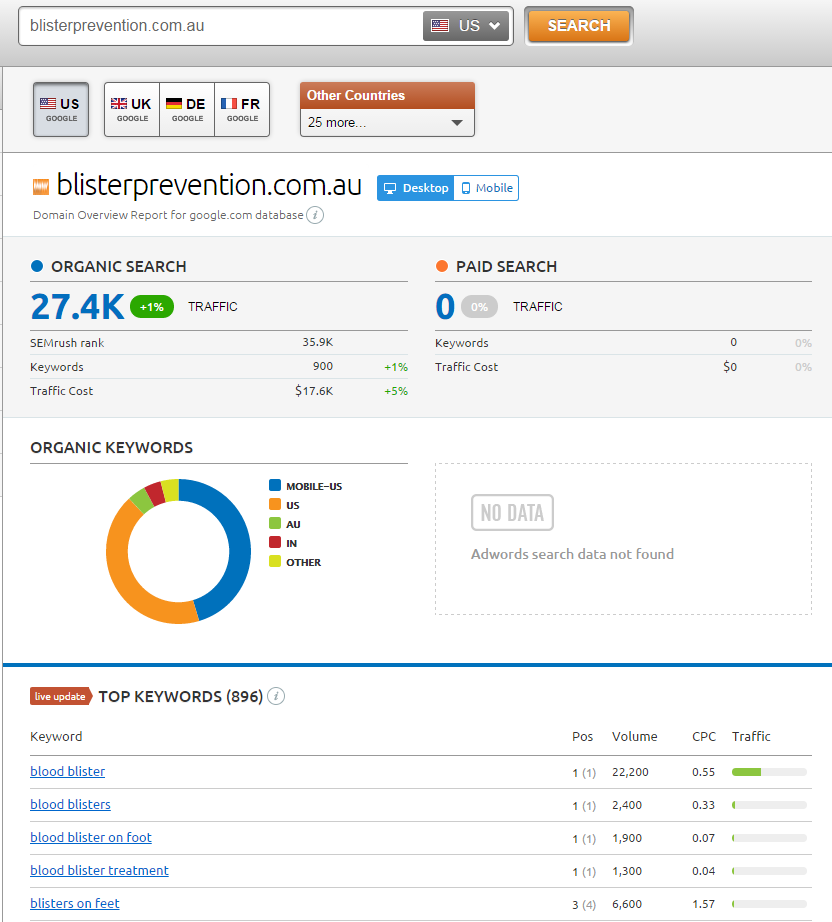
For this, I like to use Semrush. This is a paid tool. You can make a few searches a day for free, but it will leave off a lot of good information. You can always pick up the trial and see how you like it.
Put the website into Semrush and click search. This will give you an idea about how many visitors they are receiving a month as well as their top keywords. The top keywords is what you want to really take a look at here. These will typically all be related to your niche. Write them down! If there is another niche site ranking for these keywords, chances are, you can probably rank them as well with better, more in depth content.
Buyer’s Intent Keywords
Okay, now you have your final list of keywords and you need to prune them down.
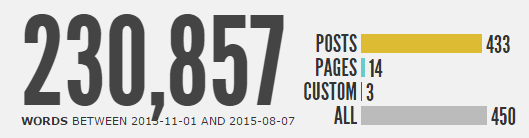
Having a site with a lot of information but no content that actually leads the buyer to purchase anything is a waste of damn time. I would know. I spent the time and effort to write 433 posts on an information site. You can see from the screenshot below how many words are on that site. While it receives great traffic, it makes a whopping $30-$40 a day because the keywords I chose do not have buyers intent. Learn the lesson I had to learn the hard way.
You want to give a good hard look at your list of keywords and think about it from a buyers point of view. If you were to search that keyword in Google, could you end up purchasing something? As we are using blister treatment as an example, if someone searched “how to treat blisters” would they purchase a product? I think they certainly could. There are lots of creams and ointments you can sell on this page and work them into the content to answer the visitors question.
Get rid of all keywords that have zero buyers intent. Throw the remaining keywords back into the Google Keyword Tool and order them by searches a month. Export them to an excel file and move to the next step.
Determining Competition
People ask me all the time, “Neil, I have XXX keywords in my list, how do I find out if I can rank for them”. There is no real concrete answer to this question but I can go over a quick and easy method that has served me well. A lot of knowing if you can outrank the competition is going to come from experience of actually doing it. Since you are beginning the process I find taking a look at a few things.
- Keyword In The URL: Open up an incognito window and start doing a search for your keywords one by one. Take a look at the top ranking sites. Do they use the keyword in the URL? Make a note of that in your spreadsheet.
- Keyword Density: Run the ranking URLs through http://tools.seobook.com/general/keyword-density/ and see what the keyword you want to rank for is sitting at. I like to keep most keywords at about 1%. If their main keyword has a .05% keyword density, chances are you can include it one more time in your article, and be able to outrank them.
- Referring Domains: This is the big one that I think is a generally good indicator if you can beat pages that are ranking. To determine referring domains, I use another paid tool called Ahrefs.
Take the top ranking sites and through them in Ahrefs. Remember to change the parameter to “Prefix” if it is a URL and not the homepage that is ranking.

As you can see from above, taking the niche site we found earlier, the page that is ranking for the term only has 2 referring domains.
The lower amount of referring domains the easier it is going to be to outrank the competition as a rule of thumb.
Tip #6: Watch out for PBNs
PBN stands for private blog network and are sites that are set up for the sole purpose to link back to a persons money site. In Ahrefs, go to the referring Domains option on the left side and look through the links. Are they real sites? Could you possibly get a link from that site too? Keep those in mind. No PBNs are a good thing but just because they have a few, still does not mean you cannot outrank them in the future.
Go through and do this for every keyword in your list. What you should be left with is the easier keywords to rank for. Order them by searches a month. I personally like to write articles with the lowest searches a month and work my way upwards as they rank faster, and can be bringing money in while you are working on larger terms.
Now that you have your keyword list complete (woot, you made it further than 98% of anyone who wants to create a web property), you can finally set up your website!
Step 3: Setting Up Your First Website
You have one of the hardest and most time consuming processes out of the way now (keyword research) and can finally get your blog up and running. You are going to need two things to do this. One is a domain name, and the other is web hosting.
Get A Domain Name
A domain name is the web address of your new website. Facebook.com is a domain name. This is going to be what people remember your site by, what people are going to type in when they want to visit your site, and is going to give the visitor the first impression about what your domain is about.
Some people like to pick out an EMD or PEMD (exact match domain, partial exact match domain) that deals with their keyword they want to target. I would highly recommend you do not do this.
Instead, pick out a domain that can become a brand. You want a name that gives visitors an idea about what your site is about without trying to cram keywords inside. Facebook, Google, Reddit, these are all great examples of domains that are brands.
Head over to Namecheap and see what is available.
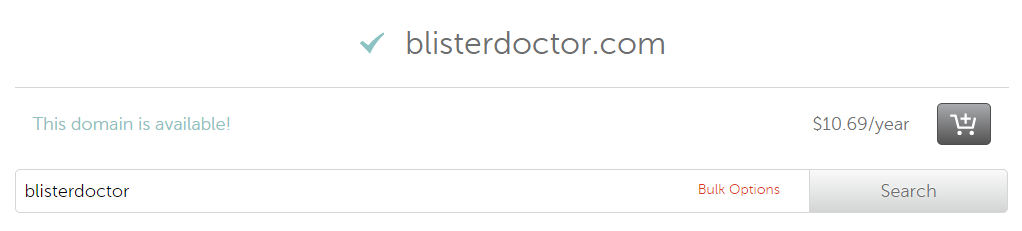
I prefer to use Namecheap because they are relatively inexpensive ($10 a year) and offer great support. They also give you free WhoIs Protection for the first year. This will keep your information safe so that people looking up who runs your website will not see your name and address.
Once you purchase your domain name, on the left hand side of your Namecheap panel, you should see “Transfer DNS to Webhost”. Click on this and keep this page open!
Getting A Webhost
While a domain name is going to be the “face” of your website, you will need somewhere to store all the files and folders for all the material you are going to put online. The servers we place this information on are called web hosts.
There are thousands of different web hosts out there but the one I always recommend to beginners is HostGator. They let you get started for very cheap, and the 24 hour live chat feature has saved my ass more than once. Once your site outgrows HostGator, you can start to think about getting a dedicated server from another company.
Hell, even Passive Marketing is still hosted on HostGator.

Pick up the Hatchling Plan or the Baby plan. The Hatchling plan allows you to host a single website. If you have more than 1 domain you want to host, you will need to go with the Baby Plan.
Use Coupon Code: PASSIVEMARKETING for 25% off when you sign up. You can also use PASSIVECENT for 1 penny hosting.
When you are signing up, click on the button on the top that says you already own a domain name. Fill out all the information and halfway down the page you should see additional services.
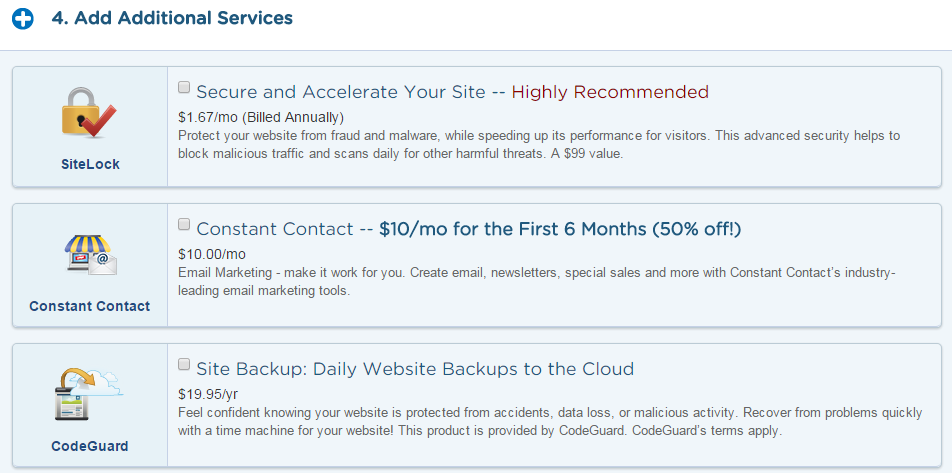
Make sure all of these are unchecked. You will not use them and it is just another way to get some more money out of people.
Finally, make sure to enter the 25% off coupon code and order your hosting package.

Connecting Your Domain Name And Hosting Account
Now you have a hosting package, as well as a domain name. You need to hook them up together so that you can install WordPress, a blogging software on your actual website.
To do this, log into your Cpanel. Hostgator will have sent you an email with your login information for your hosting account, as well as login information for your billing account. Login to your cpanel. Scroll all the way to the bottom, and on the left hand side you should see something that looks like this.
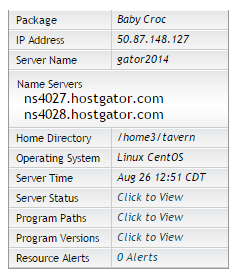
Copy down these name servers. These are what tell your domain name where to pull the information from.
Head back over to Namecheap where you should still have your account open on the page that says “Transfer DNS to webhost”. Select custom name servers, and enter in the name servers that you see on your Hostgator page.
Note: they must be the name servers in your hosting account, not the ones from the image above.
Installing WordPress
It is now time to install your CMS or contant management system. WordPress is super user friendly and incredibly versatile for any website you want to create. After install WordPress on your blog, I will walk you over how to set it up properly.
Alright, if you are not still logged into Hostgator, log back in. Scroll down near the bottom to the section called Software and Services. It should look like this.
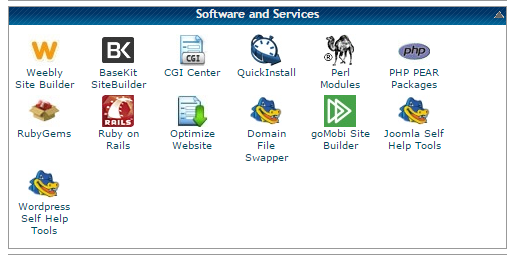
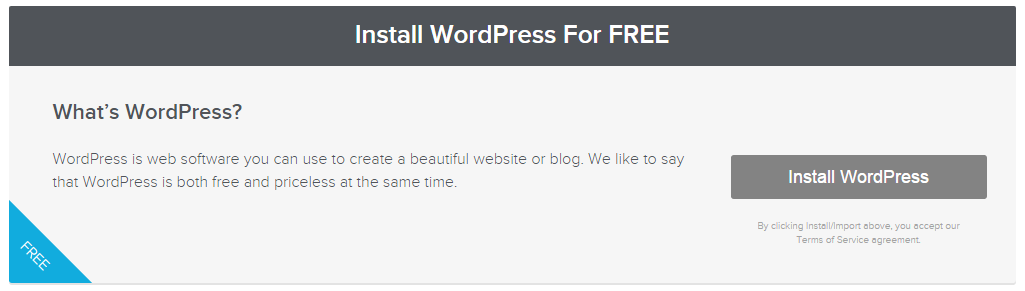
Click on Quick Install. When the page loads, select WordPress from the left hand menu, and then click on the button that says Install WordPress.
Select your domain from the drop down menu, and then fill in your information. Hit install and wait. The process typically takes just a few seconds.
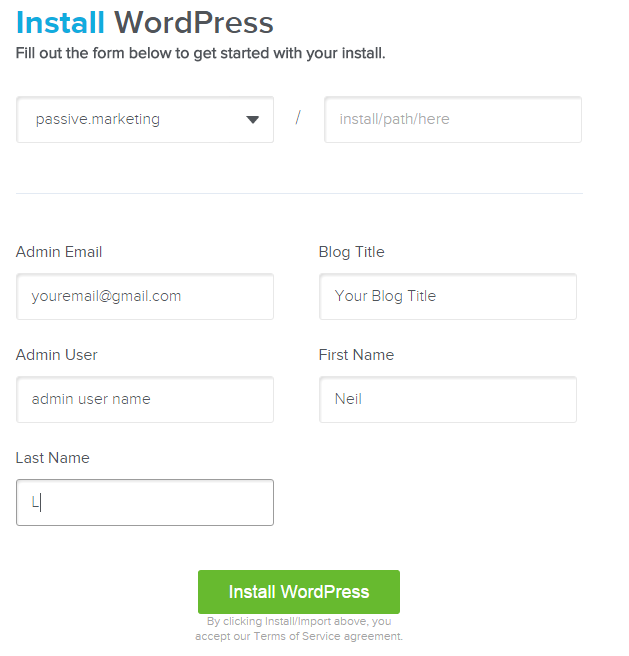
At this point they should give you a login url with a generated password.
Login URL: http://yourdomainname.com/wp-admin
Open up the URL, enter your password, and login to your brand new website!
Setting Up WordPress For The First Time
When you first login, there are a few things you need to do. Here is a quick guide.
- Change your password
- Delete sample postsetting up
- Delete sample page
- Change permalinks
Changing your password:
You want to be able to have a secure password but at the same time, have a password you can actually remember instead of the one that was auto generated for you. In WordPress, click on Users in the side profile and then your profile. There are a lot of options here, but the one you are looking for says New Password and can be changed to whatever you like.
Delete Sample Post:
These are where posts are going to show up on your site. To begin with, there is a sample post. Delete it.
Delete Sample Page:
There is also a sample page. Click on pages in the side menu and delete the page. This will give you a clean slate to work with when you start producing content.
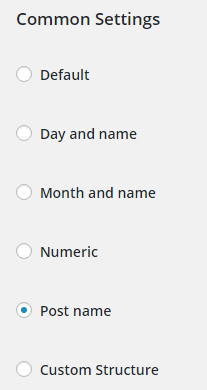
Changing Permalinks:
Permalinks are going to be how your web URLs are displayed in your browser. We want these to be clean and without unnecessary numbers and slashes.
Go to settings and click on Permalinks.
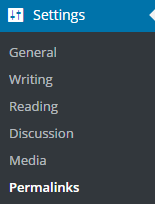 I always recommend that you pick post name here. This will display your url, and then directly following that will be the name of your post or page. This looks clean and has always worked for me in the past.
Click on save settings. You now have the necessities done and it is time to move on to setting up the proper plugins.
Setting Up Plugins
What are plugins you may be asking? Well, they are small bits of code that are used to perform a function on your site. You do not need to know how to code to use them. There are hundreds of thousands of different plugins out there, and each one performs different tasks. I will be going over some of the ones I think are essential, and then some of the plugins that I recommend on top of those. To install any of these plugins, click on Plugins in the WordPress menu on the left side, click add new, and search for the plugin in the online directory.
Required Plugins
Recommended Plugins
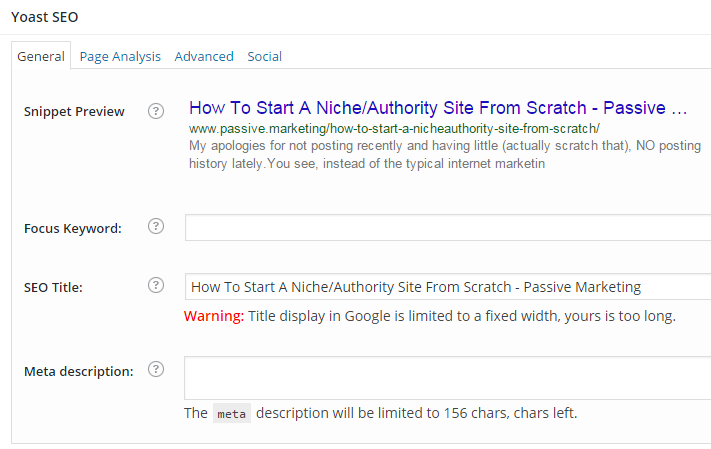
Yoast SEO

Yoast SEO is what I use on my site to create a sitemap (list of your URLs to submit to google), as well as change how my posts will show up once they are indexed in search engines. Install this one. Once you get to writing content, you will see a box show up at the end of each article on your dashboard where you can change the meta description (text below search results) as well as the name that will be displayed in Google. It will look like this:
Akismet
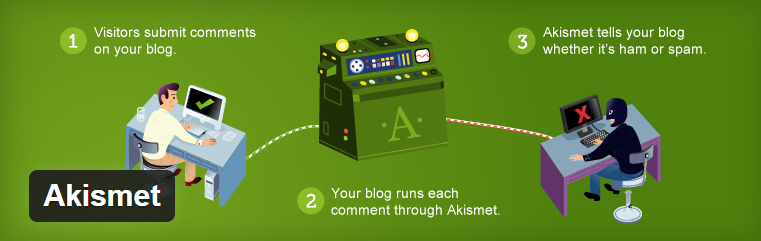
When you first start your blog, you are going to get a LOT of comments. You may be super excited about this. The reality is however, that the majority of these comments are being left by bots to try and get a backlink from your site. This is referred to as comment spam. You can delete these comments as they come in, but as your blog grows, you are going to get more and more of them.
The way that I combat this is by using a plugin called Akismet. This plugin will automatically detect spam comments and keep them away from your site without needing to do anything.
Install the plugin. It will then ask you to set up an account. They will ask you for a donation, but this is a free plugin and you can set the slider down to zero if you want to use it for free which is what I did. You then take the API key that is generated for you, place it in the Akismet plugin, and update your settings. From now on, it will block all comments that it thinks is spam. The following screenshot is an example of a newer site I have set up. It really does a lot of the work for you!
 IMsanity

IMsanity is a must have plugin when you start a site. Do not fear the creepy image they have used, this plugin is a life saver. What it does is that it stops you from uploading massive images to your site and automatically re-sizes them.
This will keep your site running smoothly and loading fast. If you are uploading massive files, your site is going to slow down. When your site slows down, visitors do not want to wait for it to load and will probably hit the back button in their browser. Since we are growing a business here, this is potential loss of revenue for you.
WP Smush
WP Smush is another plugin that I like to use to keep my site loading fast. This plugin will strip useless information from your images to help reduce the file size without losing any quality in the pictures. This compression process keeps your images small so they load extremely fast.
wpmudev has taken over this plugin and there is a free and paid version. The free version is all that you need. Every once in a while, you can go in to the settings of this plugin and hit the bulk smush tool. This will compress 50 images at a time. If you have more than 50 images, just wait till the process is done and click on the button again. Just using this plugin helped me get one of my newer sites to load over a second faster which has a good benefit on ranking higher in the search engines as well as user engagement.
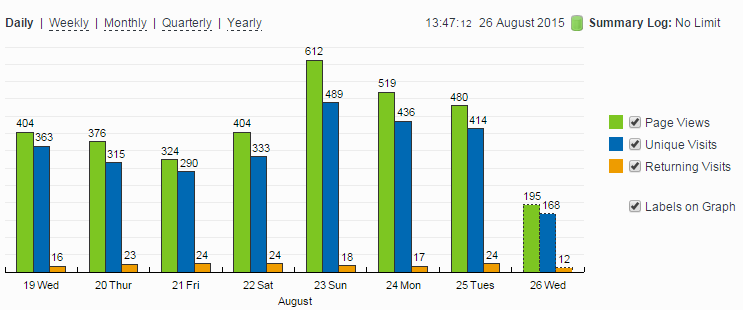
StatCounter
A lot of people like to use Google Analytics, but I actually prefer a plugin called Statcounter. I can check on my visitors in real time, with a nice graph, and see all sorts of information about them such as where they are coming from, what country and IP they have, as well as any outbound links they are clicking on all from my WordPress dashboard. A handy little plugin! This is just what I use and recommend to others. It is by no means necessary.
TablePress

If you are going to be starting an affiliate website, this plugin is very useful. It allows you to create nice looking tables without needing to code one yourself. These are great for showing a comparison between multiple products. If you place a table near the top of your pages or posts your visitors are more likely to click on your affiliate links which makes you money. This is a free plugin and very easy to use. This plugin also makes use of shortcodes. This means that when you create a table, it will give you a code that looks like this: [table id=1 /]. Then all you need to do is take that code, and put it in a post for your table to appear.
Word Stats
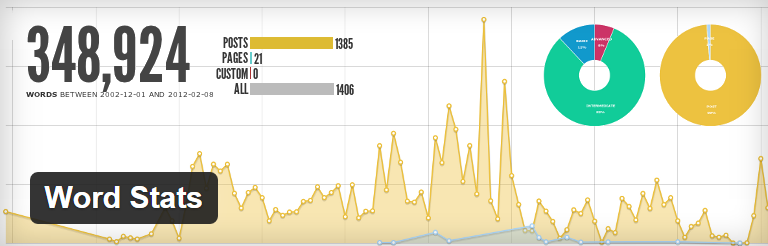
Instead of tracking my progress of a new site by how much money it is making, I like to track by how many words I have written for my site. This is a good practice to have a content goal, instead of a money goal when you first begin. This shows that you are moving forward and providing a lot of valuable content for your readers. People are endless content consumers these days so the more content you give them to read, the higher the chance of you making money with that content if you can get it in front of people. This plugin gives you a nice little graph with how many words are on your site as well as how many words you post each month.
Social Media Widget

If visitors like your content, they may want to follow you on social media. Social media is HUGE when you first start a site. You will want to have a Facebook, Twitter, Instagram, Pinterest, and maybe a few other accounts that you are posting to on a regular basis. This little widget goes in your sidebar to display what networks you are a part of so people can click on them and follow you.
They will look like this:

Setting Up Essential Pages
It does not matter what type of site you create, if you are going to be making money with it, you need to have a few essential pages on your site to be compliant with Google or affiliate program policies.
Pages You Must Create
- Privacy Policy
- Disclosure
- Contact
- About
Privacy Policy
This is one of the most important pages. If you are going to be using Google Adsense on your site, you need to include certain information about the doubleclick dart cookie. If you do not create this page and display Adsense on your site, you could possibly end up losing your account for not following their terms of service.
Click on pages in WordPress, create a new page, name is Privacy Policy.
For the text, I would suggest you visit this page: http://www.freeprivacypolicy.com/
This will create the policy you need for free. They will try to upsell you on different services but this is not needed. Just go through the process, get your free privacy policy, and then copy and paste the text into your page you just created and hit publish.
Disclosure
A disclosure is important if you are doing affiliate marketing. It is required to tell people somewhere on your site if you are making money from their clicks. This is the text that I use for that page for all of my Amazon affiliate sites.
http://www.websiteURL.com/ is a participant in the Amazon Services LLC Associates Program, an affiliate advertising program designed to provide a means for sites to earn advertising fees by advertising and linking to amazon.com.
Throw this on a page called Disclosure and publish it.
Contact
A contact page lets your visitors who have a question about your content, or a concern get in touch with you. Some themes (we will get into these a little bit later), come with a contact page template, but others do not. If you do not have one, then you can use a plugin to create a contact form. This will allow a visitor to fill it out with their questions and then it will be sent to your email.
Since these forms can be spammed as well by bots, I would suggest you use a plugin called Contact Form With Captcha. You can find that here: https://wordpress.org/plugins/contact-form-with-captcha/.
About
This page is where you can tell your visitors all about why you decided to create the site in the first place. You can give some information about yourself, why you are qualified to be writing on the topic, and what you can do to help them. Write up a post all about you and your site and publish it.
Setting Up Your Menu
Now that you have a few pages created, you need them to be available so visitors to your site can see them. To do this, Click on appearance in the WordPress side bar, and click on Menus.
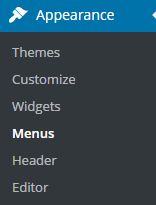
From this page create your new menu, and drag and drop all the pages you created. Then click save menu.
Finally, and this is important or your new menu will not display on your site, you need to click on manage locations, and assign the new menu you created. Once you do this, your menu will show up on your site.
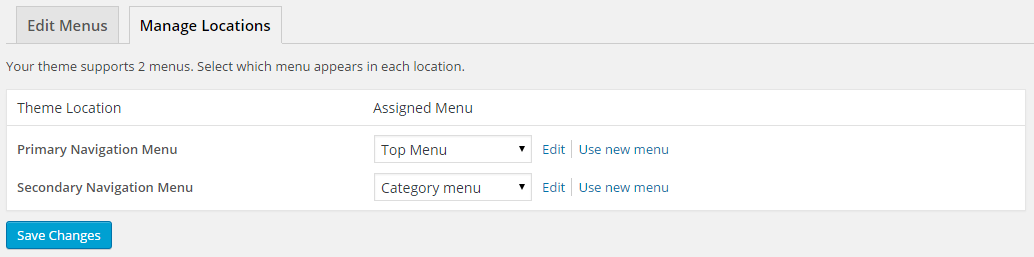
Click on save changes and your setup should be complete.
At this point, open up your new site and take a look around! You should see your menu on the top with the pages you have created, but other than that, it is going to be looking extremely bland. Time to fix that problem!
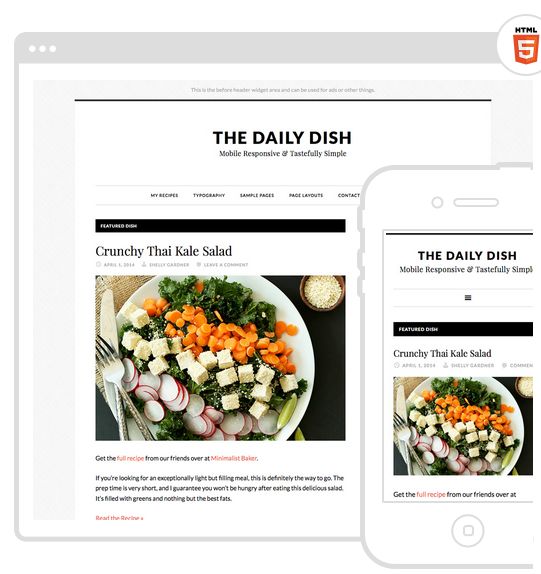
WordPress Themes
To give your site a brand new look that is pleasing to the eye, we are going to be using WordPress themes. There are a ton of free themes available, but the paid themes are going to look better and have more options.
To look for themes, click on Appearance –> Themes –> Add New and then you can search through the free themes that are available.
If you want to go with a paid theme (and I highly recommend that you do at some point, although not required), then here are some of the marketplaces that I suggest.
- ThemForest – The is one of the biggest paid theme marketplaces and where I have purchased many themes in the past.
- Studio Press – This selection of themes is probably my favorite and what the majority of my sites currently run on. It makes use of a framework called Genesis which is extremely fast and responsive and you can apply child themes to them as well. Worth every penny here.
Go ahead and purchase a theme you think would fit best with your site, or go with a free theme. Then on the appearance themes tab in WordPress, simply upload the files and install it. Then click on activate!
Go ahead and check out your new site now, it should look much nicer. Some of these themes are going to require you set them up so make sure you read any supporting documentation to see what options are available to you.
Step 4: Writing Content For Your Website
You have everything set up now and are ready to start the process of creating the content on your website that your visitors are going to read! This can either be the fun part, or the part people dread doing. However, it is a necessity and I would recommend doing it yourself for the first 100k or so words (which you track through the word stats plugin) so you get a good feel of how things work. I will be going over how to outsource content right after this section.
In order to create a lot of very useful content, make sure you have some coffee at the ready! I do not start my writing in the morning until I have a few cups of black coffee to start my day.
Article Titles
Remember way up above when you came up with a list of keywords? You are going to be using those keywords inside your article titles. This does NOT mean that your title should just be your keyword. You want to engage your reader with the title and then give them exactly what they are looking for inside the content. You can use the meta description (through the yoast plugin), to clickbait your readers into clicking on your article, but the title needs to be laser targeted to what you will be delivering to them.
From our previous example with the keyword “how to treat blisters”, you want to craft an article title that is both search engine friendly (has the keyword in the title), but also gives the reader an insight of how you will structure the article.
For example, if I was writing on that keyword, a title such as “How to treat blisters at home in 9 simple steps” would be appropriate.
Article Body and Flow
This is where you are going to show you know what you are talking about and keep the reader engaged with your writing. If the visitor is not engaged or interested, or if the article is not well described with your title, the visitor may just leave your site and not even get a chance to click on one of your affiliate links.
I always start with an introduction. This introduction is going to give a brief overview of the content that is to follow and what they will be learning.
After the introduction, I will use another title in the content with a similar keyword. Then start stepping through your content, explaining and giving examples as you go. If you are writing about a problem, explain to the reader the steps you take to correct that problem and why they are better off by listening to what you have to say.
Finish off your article with a conclusion, wrap up your points, and give them something to look forward to (such as explaining what you will be going over in your next piece). This process, once nailed down, keeps the reader engaged throughout the process.
Make sure you break up your content and try not to use large paragraphs. Also make sure you use bullet points and sub headings throughout. A lot of people, just like me, land on a page and instantly scan it to see if it has the information we are looking for. If you break up your content into easily managed chunks, you have a lot larger chance to keep the reader on your page and an even greater chance that they click on one of your affiliate links or ads.
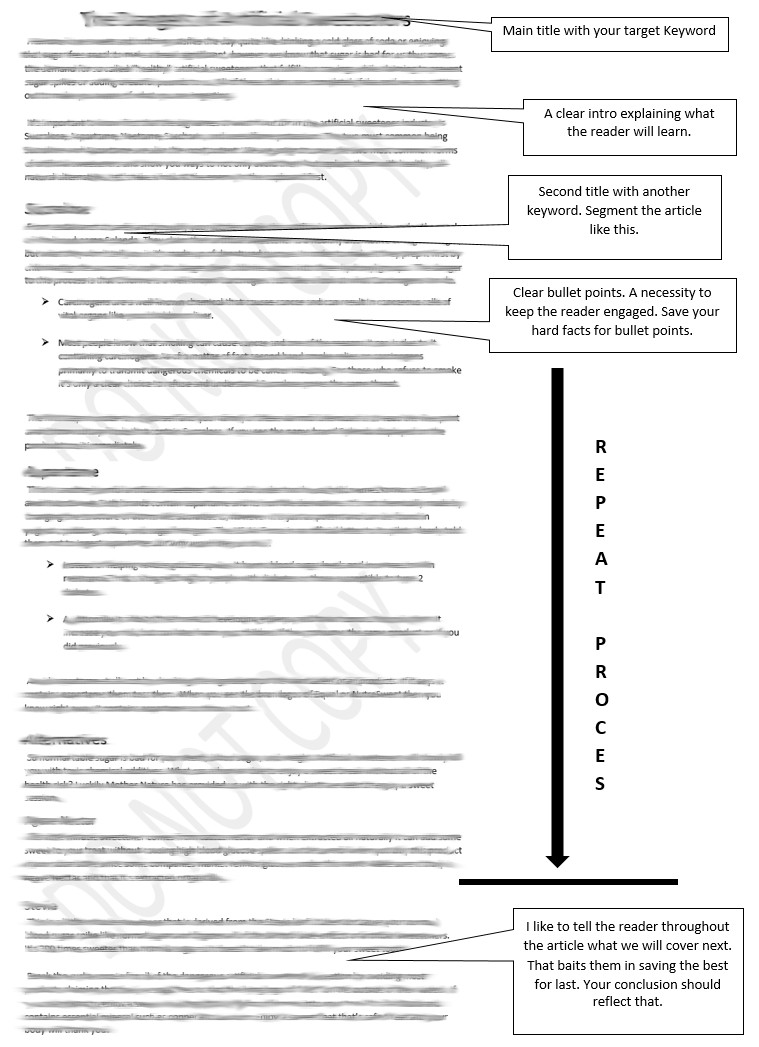
Image from Joemongan.com
Provide Value
Do not just copy and paste articles that you find around the web. You need to do research on your topic and actually provide real value to your visitor. If someone lands on your page and does not take away any more knowledge than they came in with, you have failed in your mission to educate, help and provide value. Do your research, read over a few articles on the topic if it is something you are less familiar with and structure your article in a friendly way.
Now I know what you are thinking. If your keyword is something simple and straight to the point, you think there is no way you could possible be any different than the other results out there. Wrong! Give it a personal touch. People receive articles that are written from personal experience and tone a lot better than those that are not. Would you rather read through 9 steps about how to treat blisters, or read through 9 steps that someone personally took to get rid of their blisters and exactly how long it took with pictures? If someone from the other side of the world feels a connection to you as a person, they are much more likely to buy what you are selling.
LSI Keywords Are Important
Latent Semantic Indexing, or LSI is very important now days for ranking your content in the search engines. Essentially, these are going to be keywords that all mean the same thing, but sprinkled throughout your article. This will tell Google that your content is relevant to the keyword you are targeting without stuffing the same keyword into your article over and over again.
For example, “Top cars” “Best Vehicles”… and so on. Top and best are similar to each other. If you go search for top cars in google, guess what the first result is?

You guessed it, it is a piece of content with the title that has the keyword “Best cars”. Use these type of keyword variations in your articles and you will be amazed at what you start ranking for over time.
Keyword Density
Since you are going to be trying to use LSI keywords and long tail keywords in your content, you will most likely be keeping your keyword density low. Remember, you want the content to sound natural and not be stuffed full of your keywords. When you keyword stuff your articles, they are hard to read. Not only are they hard to read, but they could lead to an over optimizaton penalty.
Run all your content through this tool and see what the keyword density is for all keywords. I like to keep all keywords below 2% most of the time and closer to 1% if I can. This sounds the most natural and has worked for me. You can check to see what the articles ranking for your keyword have in terms of keyword density as this is not a hard rule, just a guideline.
Tool here: http://tools.seobook.com/general/keyword-density/
Keep Content Simple To Understand
I have seen this happen a million times over since I have been in the internet marketing industry.
You write up a very detailed guide, but no one seems to ever read it. What could be causing this?
The issue you might be facing is that you are using complex words and hard to follow advice. If you take a look at the Flesch Kincaid readability test, you should see what I am talking about.
The easier that your content is to follow, the more people will actually read it. Use simple language and if needed, use diagrams to explain the concepts you are writing about. Take hard to understand topics and “dumb” them down for the typical person to follow. The majority of the internet’s traffic is not from English speaking countries. If a visitor from another country has a loose grasp on the language, writing simple to follow content is still going to engage them but as soon as you start using complex vocabulary, you are going to lose them.
How to “Write” Fast
Pumping out the content can be a long and frustrating process. What if there was a better way where you did not have to type at all? This solution is not for everyone, but instead of typing, you can use a speech recognition software. The one that I use is called Dragon Naturally Speaking.
You put on a headset, install the program, and it will run you through the set up process. You have to say a few commands as it recognizes your voice. Once it is fully set up, you can start speaking and it will write the articles for you.
This works amazingly well right out of the box for someone that does not have a strong accent. If you do have a stronger accent, it will make more mistakes, but over time with using it, you can train the software to understand you. This takes some time, but the majority of people can speak much faster than they can type and this tool is a lifesaver when the life blood of your business comes from content.
Outsourcing Your Content
I always recommend that you start doing the content for yourself at least for the first 50-100 articles so you know what works and what does not in terms of reader response and ranking in the search engines.
But what about after that. You are sick of writing, do not want to take the time to use Dragon naturally speaking, or you just do not have the time, but you DO have some money to spend on outsourcing content.
People think that finding great content writers is going to cost a lot of money and is not worth it. What if I told you that you could find native English writers for only $6 per 1,000 words that are ready to copy and paste into your website? Would you believe me?
Well you should! I recently have been getting 1,000 word articles from someone who graduated with a degree in English from a University in the USA. Here is how I did it.
Introducing Upwork
 Upwork, known formerly as oDesk is an outsourcing platform for freelancers all over the world to come together with clients. I write a lot myself, as well as outsource to people I know, but this was getting very expensive. I came across Upwork and thought i would give it a try as there are literally thousands of people who are willing to write content at dirt cheap prices.
Sign up for a Client account. This means you are going to be hiring people. Once you are signed up, attach a payment method (I used paypal), and verify your email address.
You are now ready to post a job. The trick here is to find native English writers living in a country where the cost of living is much lower than in the states. You always want to try and hire people who are brand new to Upwork. These people will work for much less in order to get some feedback on their profile. People live and die on Upwork through their feedback. By hiring brand new people to the platform, I can typically get them to give me 100% effort, I get a cheap article, and they get feedback so they can look for other jobs.
That being said, I always want to find a writer who is going to work with me for the long term. Below is the template I used for my fitness site that landed me 10 applicants and I hired 2 people.
I have a quick article writing job if you are interested in getting some 5 star feedback on your profile and potential long term work.
I will provide you with the article title and would like you to research and then write a 1,000 word article.
Required:
– Native English (If you are not native, please do not apply)
– Interested in completing this job quickly for the fixed bid amount and receiving 5 star feedback
– Interested in potential longer term writing after the successful completion of this job
– Bid at or below the $6 for this article
As you can see, this gets them interested in earning some 5 star feedback right away which will allow them better credibly on the Upwork platform. I give clear instructions that I want someone who is a native speaker, what they should bid for the job at, and that if they do a good job, I would like to hire them for the long term.
When setting up the job, also require that they give you a cover letter. This lets you glance over their writing and see if they are truly native English speakers. Also ask them a few questions to be included with their application that requires light research. This will tell you if they are capable of following instructions and doing the research that is required for each article.
Hiring
I do not bother interviewing people that apply. If their cover letter has spelling mistakes or grammar mistakes, I just decline them. You want to hire fast, and fire fast. If the applicant shows proper grammar usage in their cover letter, just hire them for an article. Give them a day to complete it. If they complete it and it is up to your satisfaction, use the article on your site and pay them. You can then discuss ongoing work with them.
If you get the article back and it is not up to par, you can correct all the mistakes and then post it on your website, or use it as a guest post in the future (so hold onto it). Since this first article was not what you are looking for, simply let the writer know, and fire them and give them some good feedback and wish them luck in the future.
Remember, hire fast, fire fast. This will waste MUCH less time in the long run and if you hire a bad freelancer, you are only out 6 dollars so you will not be breaking the bank.
Advanced Technique: Get Free Content For Your Blog

This is definitely something you should NOT be doing when your blog is brand new. However, I thought I would put this section into this guide because once you have built up your site for a few months or over the period of one year, getting free content is amazing. The best part is the people that are going to write for your site are going to promote it too! Here are some ways you can get free content for your website.
Contribute An Article Page
So you have been writing for a while, are getting lots of visitors every day that are interested in your topic. What if some of those people that see your site daily also have websites and know about the topics you are writing about? Chances are, they probably do, at least some of them!
Create a new page on your site that says “Write for us” or “Become a contributor”. I would make sure to link to this page in your menu, or at least in the footer of your website. This serves a few purposes. First is that it puts the link in front of your readers so that they can see that you are accepting content. The second reason is that it lets google pick up that page for when people are searching to do guest posts.
These people are searching for links, and are willing to write you articles to get them. This is not a bad thing at all! You give them a link in the article, and in return you get a great piece of content.
To ensure that you get excellent content and not spun garbage, just make sure in your write for us page, you make the standards super high. At least 1,000 words and engaging. If someone submits an article that you do not think would be right on your site, just deny it and do not publish it!
Tip: Only accept brand name links. This will keep your site safe from search engine updates or manual reviews. “Keyword” rich anchor texts look spammy anyway so avoid those.
Side Bar Writing Offer
I did not think these would work as well as they did, but I tried it out and was very surprised. Make a nice large image about contributing an article to your website, and stick it in the sidebar. Direct any clicks on that image to your “write for us” page.
Everyone who lands on your website will see this image. I have found that this technique works best on sites that are all about opinions. For example, if you ran a political blog, these would do wonders. Everyone has an opinion about politics and you know they want to voice that opinion because politics are something people feel very passionate about.
Give them a voice, an outlet to voice those opinions (content on your blog), and you will get a ton of applications. The people that just wait their voice to be heard are usually not looking for any links at all and will write content that is sure to engage your readers. You may even be able to pick up some long term writers this way that will write a few articles every month free of charge!
Manual Outreach
This is something that I have been doing lately and getting great results from. Keep in mind that this is going to take up a large amount of time, but the free content is worth it.
Make a list of some of the popular blogs and websites in your niche. Look through them and every single time you see a new contributor, write them down in a spreadsheet and gather social media profiles for each one of them. Sometimes you may even get lucky enough that their email addresses are displayed.
Once you have a large list of contributors to these other websites, it is time to get down to work. Email them all and ask them if they would be interested in writing 1 article a month for you. Typically these contributors have their own site that they are trying to spread the word about. Often they will jump at the opportunity to promote their site through a new outlet (your site).
Make sure to follow up with them if you do not hear back from them in a week. I like to do this with a private message on twitter if possible.
Breaking down the math, if you reach out to 300 writers and get 10% of those people to agree to write 1 article a month for you, you will be getting 30 new articles each and every month. That is a fresh piece of unique content every day for your blog. This keeps your site fresh, up to date, and gives readers what they want, content to consume.
This process takes a lot of time and can be frustrating when people are not getting back to you. When you DO land those guest contributors though, they will promote all the new articles they write for you on their own social media, which gives you even more readers!
Leaving Comments On Other Blogs
This technique goes hand in hand with manual outreach. While you are researching some of the top websites looking for guest contributors, take a look at the most popular articles on those sites.
Most of these sites are going to have a comment section where readers can interact with each other and the content. Start leaving comments on all the most popular articles.
For these type of comments, I usually say something about the article above, and then at the end I finish off the comment by saying “If you would be interested in being featured on “Your website here”, then please apply to contribute an article (write for us page) here.
It is not very likely that the person who wrote that article is going to apply to write for you with these method. That being said, it gives you a lot of exposure. Remember that these are popular articles that are already getting traffic. Everyone who reads that article is going to see your offer and you are going to be able to get guest authors from there.
 Using Twitter
This last technique is going to require a little bit of money initially, but if you do it successfully, you will end up with guest contributors for your blog on a monthly basis.
To do this, we are going to be running Twitter ads. Lets say that you are running a site in the fitness niche.
I would then create an ad that would link to my “write for us” page on my website. This ad can be extremely simple. Just use an image that says “WRITE FOR US”, and that you are looking for guest bloggers. The best way to see conversions out of this method is to run the ads towards only people who follow specific twitter accounts. In my fitness example, I would run the ad to only the people that are following bodybuilding.com or mensfitness for example.
If you were doing a politics site, you could use the same concept but in your ad, use a picture of a current candidate that people are supporting. “Seeking Donald Trump Fans” would probably do well on twitter.
This takes a little bit of creativity, but Twitter ads are relatively cheap. If you can get a 10% conversion rate, that is going to be some of the cheapest content you ever get. They may even continue to contribute an article monthly if it is something they are passionate about.
Give Away Gift Cards
This one has always worked for me and I do not see very many people talking about it.
Once you have build up a decent size blog which gets social shares and daily readers, host a give away. What I like to do is offer a $50 Amazon gift card to the best guest contributor for that month.
How do you decide who the best guest contributor is? Have a week where you take all the guest contributions and post them on your site. Then for the next month, keep track of how many social shares they get. You can use this tool to count: http://sharetally.co/. This will give the people writing for you some motivation to write more, write to engage your readers, and share it with their friends. All those social shares you get from their work, are going to increase your profits.
You could even take this a step further and use the Twitter ad method I outlined above to drive people to your write for us page and entice them to sign up by talking about how each month you give away an Amazon gift card to the most shared article.
You would be really surprised what people are willing to do for $50, and that includes writing and sharing a ton of great content for free!
Step 5: Collecting Emails
You know what is better than getting traffic from the search engines to your website? Having a list of emails you can email every time you post something new! Having an email list is where a lot of people make the majority of their money.
Your list is your life blood. These people can be marketed over and over to again. They are your core audience. They are the ones that thought your content was so awesome that they decided to sign up and be notified when you post something new. Respect this group of people and give them nothing but the best.
How do you collect peoples emails though? That sounds hard!
Introducing Mail Chimp
I use a service called Mail Chimp. They are free for your first 2,000 subscribers! When you are first starting your site, you will not hit that limit for a long time.
Create an account at mail chimp and log in. The goal here is to create a simple looking form, that can be placed on your site (sidebar or in the content) that will have people opt into your list.
Once you have created your account, click on lists in the top menu.

Click on create new list, and fill out the list details.
You have now created your first list and it should look like this.
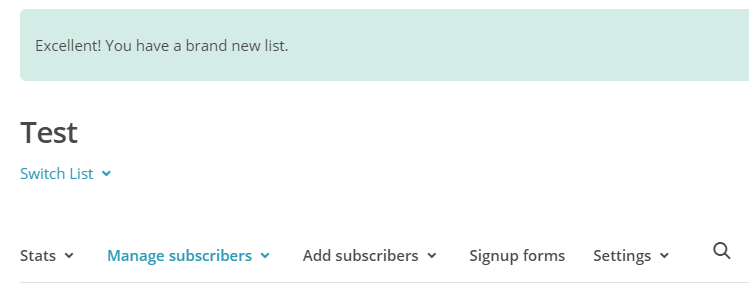
There is not going to be anyone on the list, because no one has subscribed yet! For that reason, we need to create a signup form which you can put on your website.
Click on Signup Forms –> Embedded Forms. This is where you can design your form.
When you are happy with how it looks, copy and past the code at the bottom anywhere on your site to display your signup form. From here, people can enter in their email, and once they confirm their email, they will show up in your Mail Chimp List!
Make Those Ugly Forms Look Good

The forms you create in Mail Chimp are for the most part, very ugly. Unless you are good with CSS and GTML making it look nice can be close to impossible.
If you have some extra money to spend, I would recommend taking a look at Optin Skin. This is a paid plugin that integrates with Mail Chimp and makes your opt in banners POP!
Step 6: Content Promotion – Getting Yourself Out There
Now that you have your site up, you wrote about keywords with low competition that we went over, and are continuing to write every day by yourself, outsourcing, or are getting free content from contributors, it is time to start doing some promotion.
By this point, you should be getting some traffic from the search engines because you targeted easy keywords. If you are not, do not worry, just keep pushing forward.
This entire guide is about creating a long term business that is not going to get destroyed by the next Google Update because of some blackhat techniques. For this reason, I will only be going over a few beginner techniques for promotion that are safe for your business.
Blog Comments
You may have heard that blog comments are spammy. For the most part this is true, but this is when you are using blog comments to get links.
Instead of trying to get links, use your real name, and get involved with other sites in the same niche as yours. This is going to play a crucial role in the next technique I go.
When you get involved and leave thoughtful and helpful comments on blogs int he same niche, people start to notice you. You will even start to see referral traffic from these other sites (which are more popular than yours), coming over and checking out your content.
Referral traffic always great because you do not have to rely on the search engines to give this. Never go after a link, especially a blog comment just for the link value (they will probably have a no follow attribute anyway, which means google does not use these links to rank you), but instead go after the link because it will drive traffic to your website.
Guest Posts
These just plain work. They have worked for years, and they will continue to work. Essentially, you are going to write an amazing article for someone else’s site with a link inside that article pointing back to your blog.
So how do you go about finding blogs that will let you guest post?
Well the first technique you have already started with blog comments. You should set up a schedule for yourself and make sure you comment on a few blogs each and every day. Once you have built up some credibility and have shown you know what you are talking about, you can approach the person that owns that site.
If you have been commenting on their blog for a while now, they will know who you are! Use the contact form and get in touch with them. Remember to keep the messages short and sweet. Let them know that you have an article about XXX subject, and if they would be interested in using it on their website. Since almost every blogger needs content to post regularly, they will at least take the time to look at it.
You want to go above and beyond what is expect for guest posts. You need to be on your A game. This means long, detailed, and extremely interesting content. The more guest posts you can do that are received well by their visitors, the more likely you will get to guest post in the future. This also opens up other opportunities to post on other sites.
When another website sees how well your post was received, sometimes they even reach out to you asking to feature you on their blog. This is the best thing you can hope for and it will never happen if you are not performing at 100%
There are a few other ways you can find guest posts. Open up a new google window, and search for the following. Remember to replace “keyword” with your niche.
- keyword “submit a guest post”
- keyword “guest post”
- keyword “guest post by”
- keyword “accepting guest posts”
- keyword “guest post guidelines”
By Googling these queries, you are going to land on their contribute page.
Remember how in the advanced techniques section for content we set one of these up ourselves to get free content? Now we are using this to our advantage to get our site out there and gain exposure.
When you land on their contribute page, make sure you read all the guidelines and understand them. Nothing is going to kill your chances of a successful guest post than not reading the guidelines. You should also check their site to see the topic that you want to write about has not been covered already.
Keep in mind the format they want the article delivered in and if they want you to set up an account on WordPress or not. Each one of these things should be checked, and rechecked before you even decide to contact the blogger to try and get a post.
Sending The Email
I personally receive a lot of guest post requests every day. Do you know what? Most of them are ignored. They are ignored because they are not personalized at all and are typically started by Dear Sir, Dear Madam, Dear Webmaster, The owner of XXX.com. These emails are what they use to send out to hundreds if not thousands of people automatically. Do NOT do this.
If you are going to send an email to get a guest post, at least take the 5 minutes to find out the name of the blogger. Personalized emails are going to get a lot better response, I guarantee it.
Now, if you have not taken the time to get to know them through leaving blog comments, you want to keep your email short and to the point. The first thing you should be doing is telling them who you are. Introduce yourself, who you are, what you do, and then you want to move on to tell them why you should be guest blogging on their site.
If you have never done a guest post before, show them an example of the most epic content on your own site. If you HAVE landed a guest post before, and it was recieved well by that site’s visitors, give them a link to it. This will demonstrate that you are willing to go above and beyond for the site owner which is what we all want anyways.
Guest Post Idea
You know by now that you want to get a link in your guest post back to your site. That being said, if you are going to get that link, you need to think about the reason why the other site would accept it in the first place.
Remember, they are running a business as well. You do NOT want to advertise your site. Instead, most of my results have been gotten from guest posting excellent resources for information. If you write a guest post like an advertisement, chances are it is not going to be accepted.
Stroke the ego of the site you want a guest post on. Interlink your post with some of their previous content where it makes sense. This cuts down on the work they have to do to post your article. If someone wants to guest post on my site and takes the time to do this, 99% of the time I post it without a second thought if the content is good.
Finally, make sure you end the post with a call to action. This is a line that is encouraging readers of your guest post to interact with what you just wrote. You want to get people commenting. The more conversion you can drum up, the more success with you will have with that blogger as well as visitors on your own site from the link in the article.
Blog Roundups
This technique has been working incredibly well for me over the last few months. It works the best if the other sites in your niche are in a blog style.
What you do is make a list of some of the best sites in your niche. Then you create a new post, and feature them all. When I do this, I like to give the name of site (link to their blog), display their logo, write 200 or so words about what their website is all about, and then include links to their social media profiles.
These can be time consuming, but can lead to amazing results.
 Let’s look at an example. If you type “best mom blogs” into google, you will see a lot of websites using this technique. For example, the third result gathered about 80 different websites together. Each one had a link to the site, a picture of the blogger, and then a screenshot of the website with a sentence or two about what the blog is about.
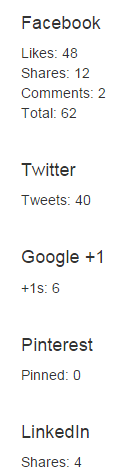
This post gathered 62 Facebook likes, shares, and comments. It also got 40 tweets, 6 Google+ and 4 shares on LinkedIn.
It also got 6 amazing whitehat links!
When you do a post like this, you need to make sure you reach out to the people you are featuring.
Say you are writing a blog post about the best dog blogs. Once your post is live, it is time to reach out to these people. Send a personalized email (remember to use their names!), and let them know that they have been featured. Also make sure to tag them on social networks such as Facebook and Twitter.
Since you are giving them a link without them having to ask, they will probably write about it letting their readers know that their amazing site has been featured somewhere else.
This works so well because bloggers love to think that they have an amazing site. If you show them that they DO have an amazing site and give them free exposure, often times they are willing to return the favor without even asking. This is why in my personalized emails, I always just let them know they have been featured. I never ask for a link in return.
Social Media

You should be setting up social media accounts as the first thing you do after you have a few articles posted on your site. Social media is crucial for blog development before you have a lot of organic traffic. Social media allows you connect to people in real time. You gain a following, and these are the people that are going to be following your site as it grows, reading your articles on a daily basis, and leaving your first comments as well as giving you the first taste of that money.
Which social media accounts should you utilize though? That is the real question. The answer is not as easy. It depends. Everything depends on something right?
You may think that Facebook and Twitter are not the best places for your content. This is where you have to get creative. There are lots of way to sculpt your content for social media. Adult content is not allowed on Facebook, but there are plenty of adult pages driving traffic to their sites. Go and check a few of these out and see what kind of tricks they are using for user engagement.
When you first start using social media, I would recommend that you nail down a single platform that you will spend the most time engaging with. You should be using as many as you (only where it makes sense), but your goal is to find out where your blog’s targeted audience is.
- Is your site about women’s fashion? Then you NEED to focus on Pinterest where 80% of the users are female.
- Is your site about professional topics? LinkedIn is where you want to focus your time.
- Is your site about adult entertainment? Then you want to focus on twitter where they are more relax and do not censor content.
You get the idea! You should start to set aside 30 minutes to an hour a day to interact with your target audience. If your target audience can be found on Pinterest, spend 30 minutes a day pinning images and following people who share the same interests with a link back to your site on the images you pin. If it is LinkedIn, start following people int he same niche as you.
Each and every day you should be following people. After a few weeks, if these people do not follow you back, simply follow them to keep your profiles clean.
Another tool you can use for Social media, and talking to and interacting with your target audience is called Buzz Bundle. This is a piece of software that will scan the internet and let you know when new posts are put up about topics that you specify. Then, using the tool, you are able to leave comments, link to your site, and help the people that are asking questions. You can read more about that here: http://www.passive.marketing/buzzbundle-review/.
Wrapping It Up
I know a lot of this can seem super daunting when you first begin. It took me months and months of reading to understand all these concepts. I have tried to condense the majority of what I have learned into this article so you have a single point of reference when starting your blog or website.
Gaining traction for your blog is a long process. Think of it as a marathon and not a sprint. If you start your niche site and do not make a sale for the first few months that is okay! Just keep your head down and keep going. The biggest mistake beginners make is that they give up too soon.

I know that the methods laid out in this book sized article work. When I first got the idea for this article, I decided I was going to create a brand new site, no blackhat techniques, and see what I could do.
That was 4 months ago, and the site is now making $1,000+ a month. I will be going over more on this site in a later article, but to date, the site has 208 posts on it. I managed to hit these numbers with 5 guest posts, and utilizing social media. I followed the exact steps that I have laid out in this guide.
Make SURE you do your keyword research. If you spend the proper amount of time picking out the keywords, and then take the time needed to promote yourself, you can grow a real business that will bring you income for years to come. Who knows, maybe eventually this could be your full time job!
To your success!
Neil
You knocked this tutorial out of the park Neil. Thank’s for crediting the images and good luck with Passive Marketing. =)
Great read as always Neil!
I like reading comprehensive stories like this, there is a way it inspires me. Thanks for taking time to put this together, Neil.
Interesting long post complete with detailed tutorial about starting a good niche. Your achievements are also quite motivating.
A well detailed post about building an authority site Neil,
Building a new site is usually very easy but whats always more tedious is trying to make the site successful, that is where the main work lies on.
However, having good and handy guide like this by the side will really make it less tedious for newbies.
Thanks for sharing.
This is the best tutorial i have seen i along while, started a site but just saw that it is a 10 man job. Told my friends i will be be doing this for along time but they were all laughing. Need to change my style and focus on small sites.
Thanks! The goal should be to start small and scale your site up as you go along. Everyone starts somewhere. Best of luck!
Hey Neil,
First time visitor (came here from a /r/Entrepreneur comment, but I am completely 100% blown away by the amount of amazing content you have here.
I’ve read all of Spencer’s posts. I read /r/Entrepreneur everyday. I feel like I learned more from this one post than everything I’ve learned over the last year. It’s answered 99% of all my questions that other bloggers did a poor job of answering.
I started my first niche site a few weeks ago, with what seems to be a really promising keyword with lots of longtail keywords. And I can’t wait to use all of this newly found info.
Plus, you’re an excellent writer. Keep on doing what you’re doing!
Thanks Danny! Best of luck with your new site. If you ever need anything feel free to reach out.
Hey Neil!
Awesome site thank you for everything you’re sharing. I just have one quick question about plugins. Jetpack yay or nay?
I have deactivated most of the features but it’s still a clunky plugin. Is it worth it for the protect and enhanced distribution features? Apart from that I think the contact form is the only other part I use, though I’m unsure about some of the other features and whether or not to leave them on. Thanks in advance!
Hey Kieran! Jetpack is literally the first thing I remove when I launch a site. From my experience it slows sites wayyyy down. Try out contact form 7 if you want a lightweight contact form. Too me, Jetpack is simply bloatware.
Thanks for the reply! This is what I thought so It’s going to get the chop as soon as! We shall no doubt speak again in just start 😉
Followed you over from Reddit and really enjoying your content here. Quick question about your plugin recommendations: do you think there is some benefit to using both IMsanity and WP Smush now that the latter also includes an image resizing function? Thanks!
If you actually take the time to do it properly and resize your images BEFORE you upload, there is really no need for IMsanity. Even though WP smush will resize images, IMsanity will make it impossible to upload large images in the first place. If you actually take your time, WP Smush should be just fine.
Wow. Just….wow. I just stumbled on the Reddit bit and haven’t a clue what I’m doing, and at the moment I’m not even looking at online sales. That being said, this is still one of the best articles I have read for clarity and info. Thank you for putting all this out there.
Thanks Lauren! Best of luck on whatever you pursue in the future.
This is pretty damn awesome. I follow you around on Reddit and I made sure I clicked on your links and purchase items from this post (hosting and domain) 😉 I appreciate the effort you make for those of us that have no idea as to what we are doing. I am just going to start and hope I learn on the way with your guidance! Thanks Neil.
As mentioned by other commenters here – this is an awesome tutorial! The detail and the depth to which you have gone in making this article is truly inspiring.
I have been starting to seriously think about getting into the niche market area for some time but I feel that with this guide a lot of the guess work on what to do and when has been removed.
Thank you !!!